Recently I’ve been noticing that the fuel consumption on the old girl has been a bit high. Struggling to get the 40MPG area!
On a whole since i had a engine ECU software update back little while ago (was done as part of NOX sensor replacement procedure) its not been so great. From what I read on FB groups it seems to be “a thing”. The gist is that the software update corrects the “emissions scandal” issue but seems to have an effect on MPG. Also for me i feel that the car “doesn’t go as well as it should / did” since the update. Without some tests on a rolling road, its hard to say, on the other hand this car has done 350000 miles so perhaps its just a bit “worn in”.
Enough of quote fingers.
Thinking about this more, I thought well its due a service next month – its going to be due an air filter. Looking back through the Mercedes Digital Service Book application – air filter last done at 297919 miles, November 2019. Current, 349500 miles.
Mercedes specified interval is 46500 miles / 75000K or 4 years whatever comes sooner. Timing eh. Fantastico.
Parts required: Air filter – A6510940104 – I highly recommend getting a genuine Mercedes-Benz one or at least a good branded OE one. I know that normally manufactures such as Mann make these for MB, but you know when you buy a genuine one, you are 100% getting what you want. There are fake Mann / Bosch etc ones out there, so be careful! Also if there happens to be any modification or supercession to the part, your getting the latest variant.
If you happen to be here and don’t have a OM651 variant;
– the part number for the OM642 (v6 diesel) – Air filter – A6420940000 (Note, this Mercedes number is a pair. Some places sell them individually.) Cheap ones do NOT fit well.
– The part number for the M276 (V6 Petrol – E300, E350, E400) – Air filter – A2760940004
– The part number for the M268 (V8 Petrol – E500) – Air filter – A2780940004
This post if focused on the OM651 engine, but other engines are relatively straight forward too.
To replace the air filter on the OM651 is an easy task;
– Pop the bonnet open
– Remove the engine cover
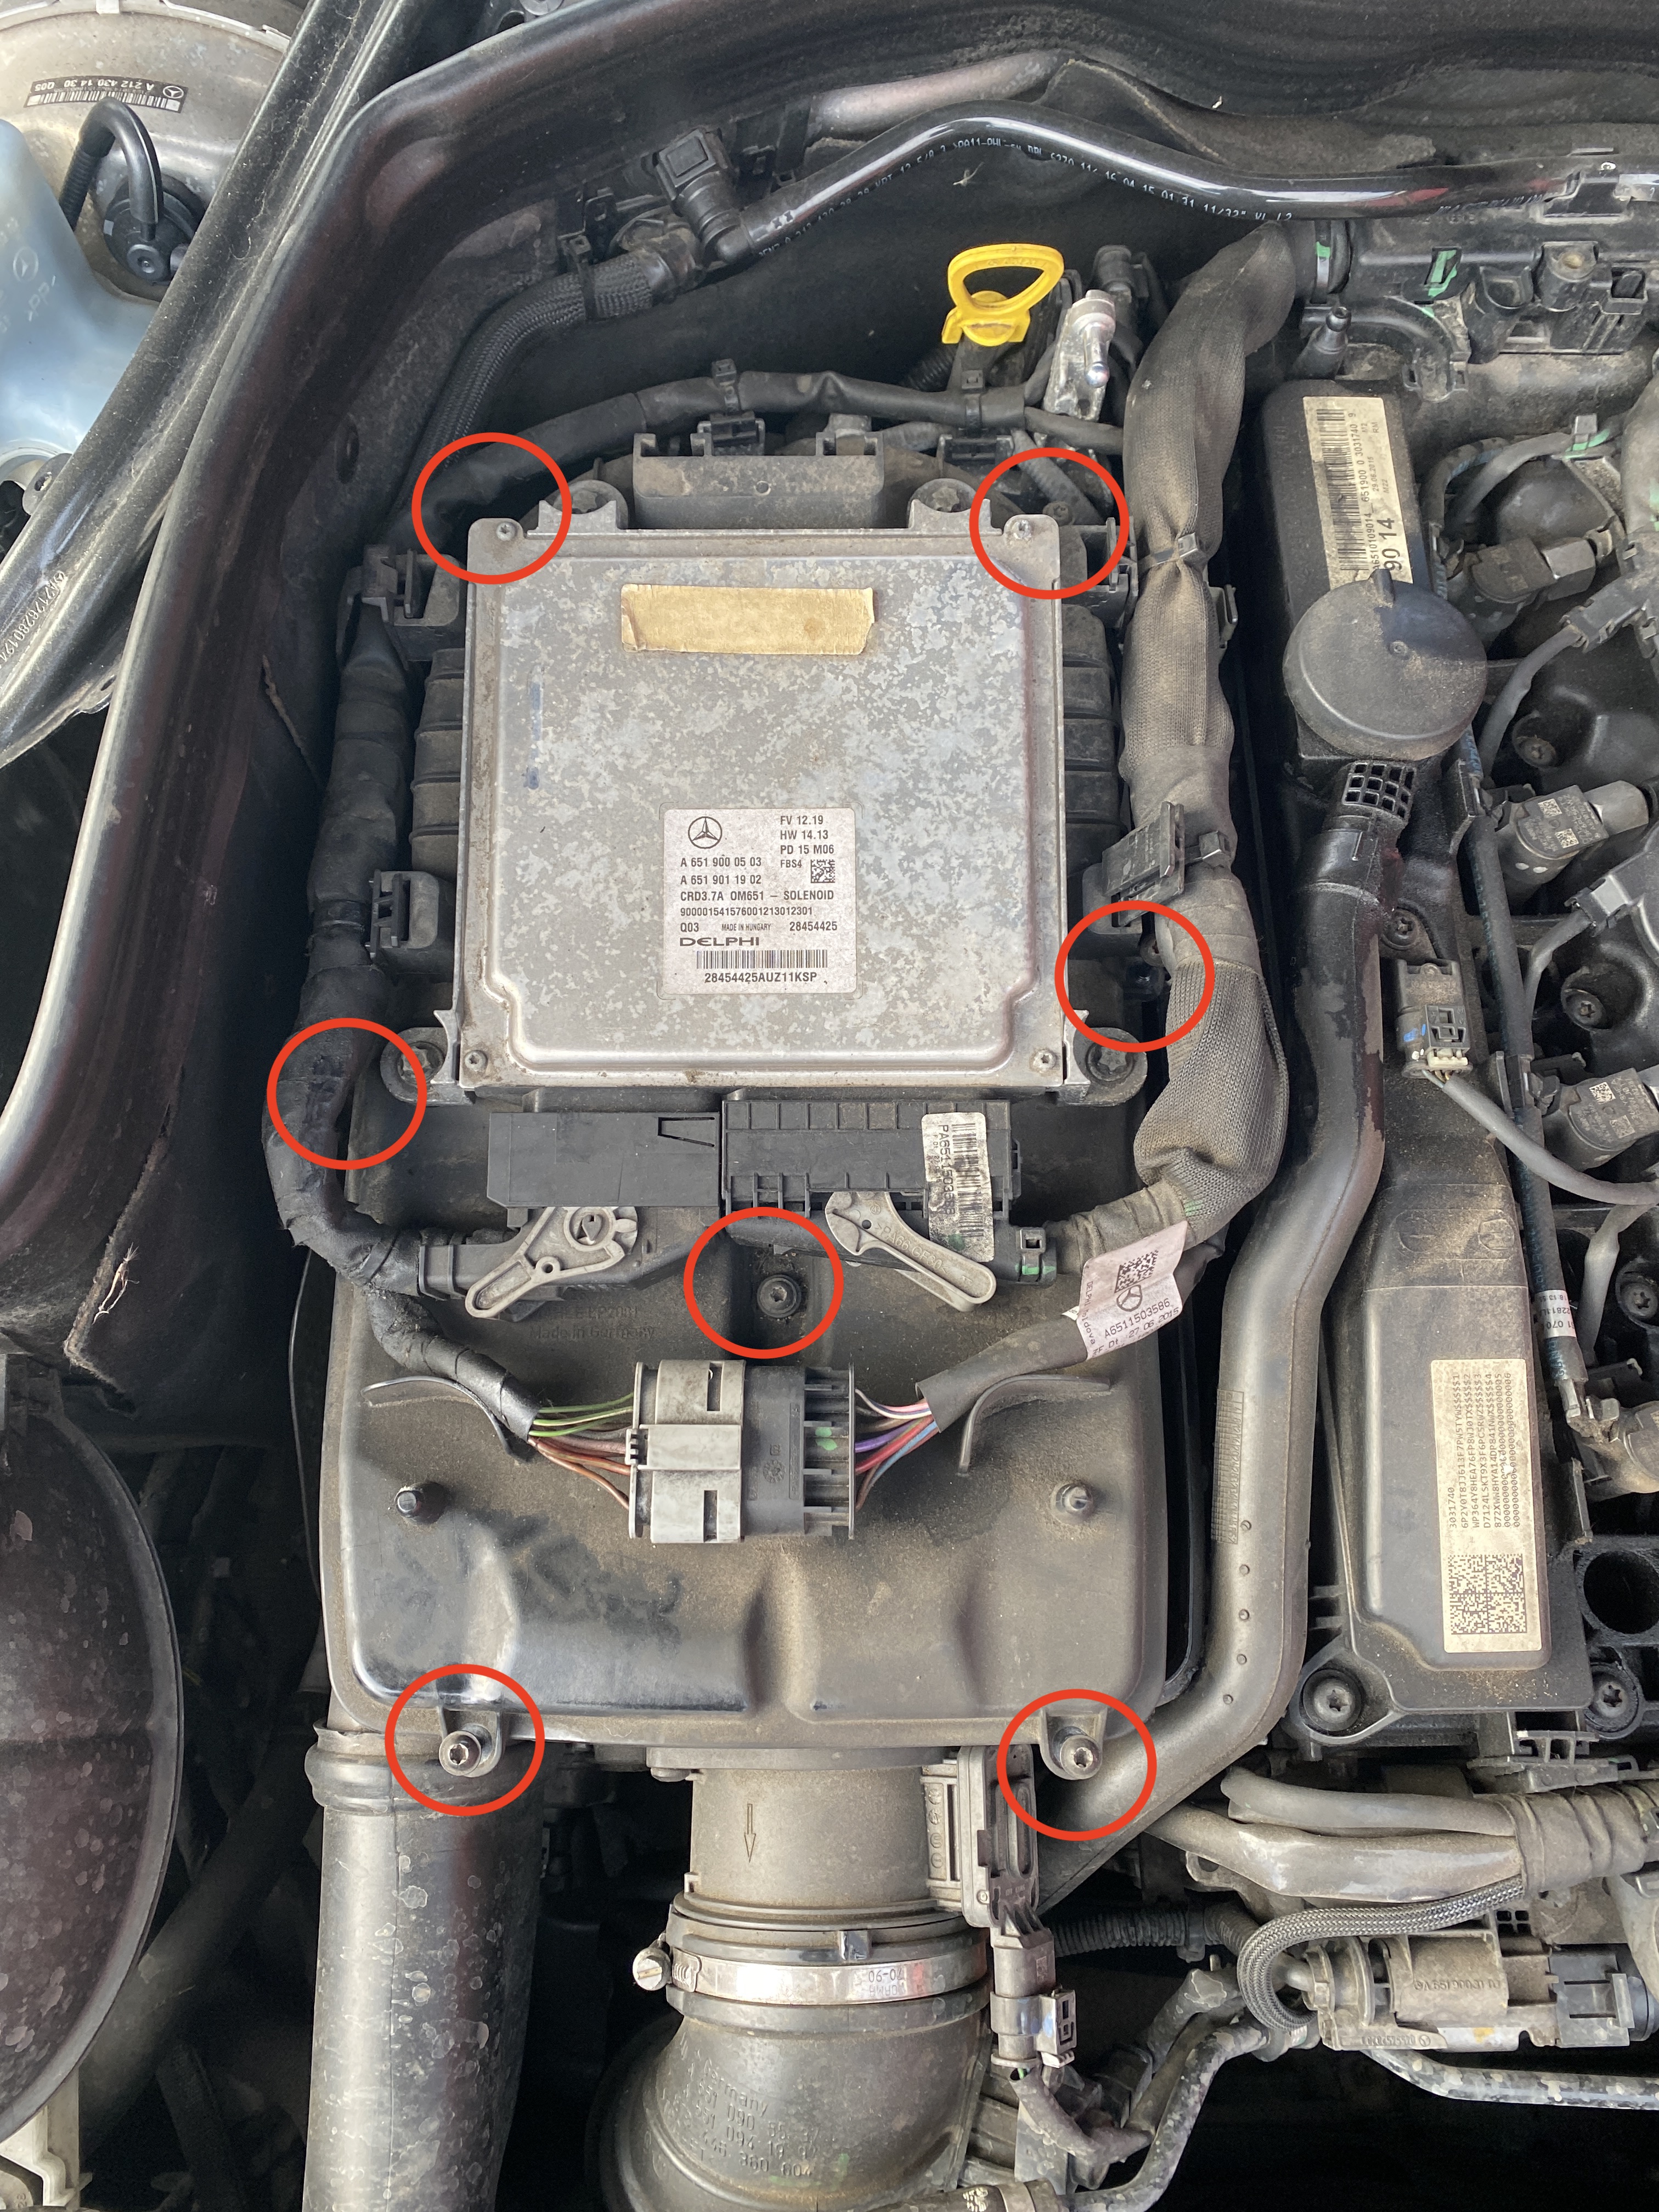
– Remove the screws securing the top of part of the air filter enclosure to the bottom part. A couple are partially blocked by wiring but the can be pushed aside. No need to remove the ECU or unplug anything.
– Lift the top part up and remove old air filter.
– (Diagram below)
– The screws are Torx heads. If you don’t have the correct type, a cheap eBay set like this will do the job and handy to keep in your boot.
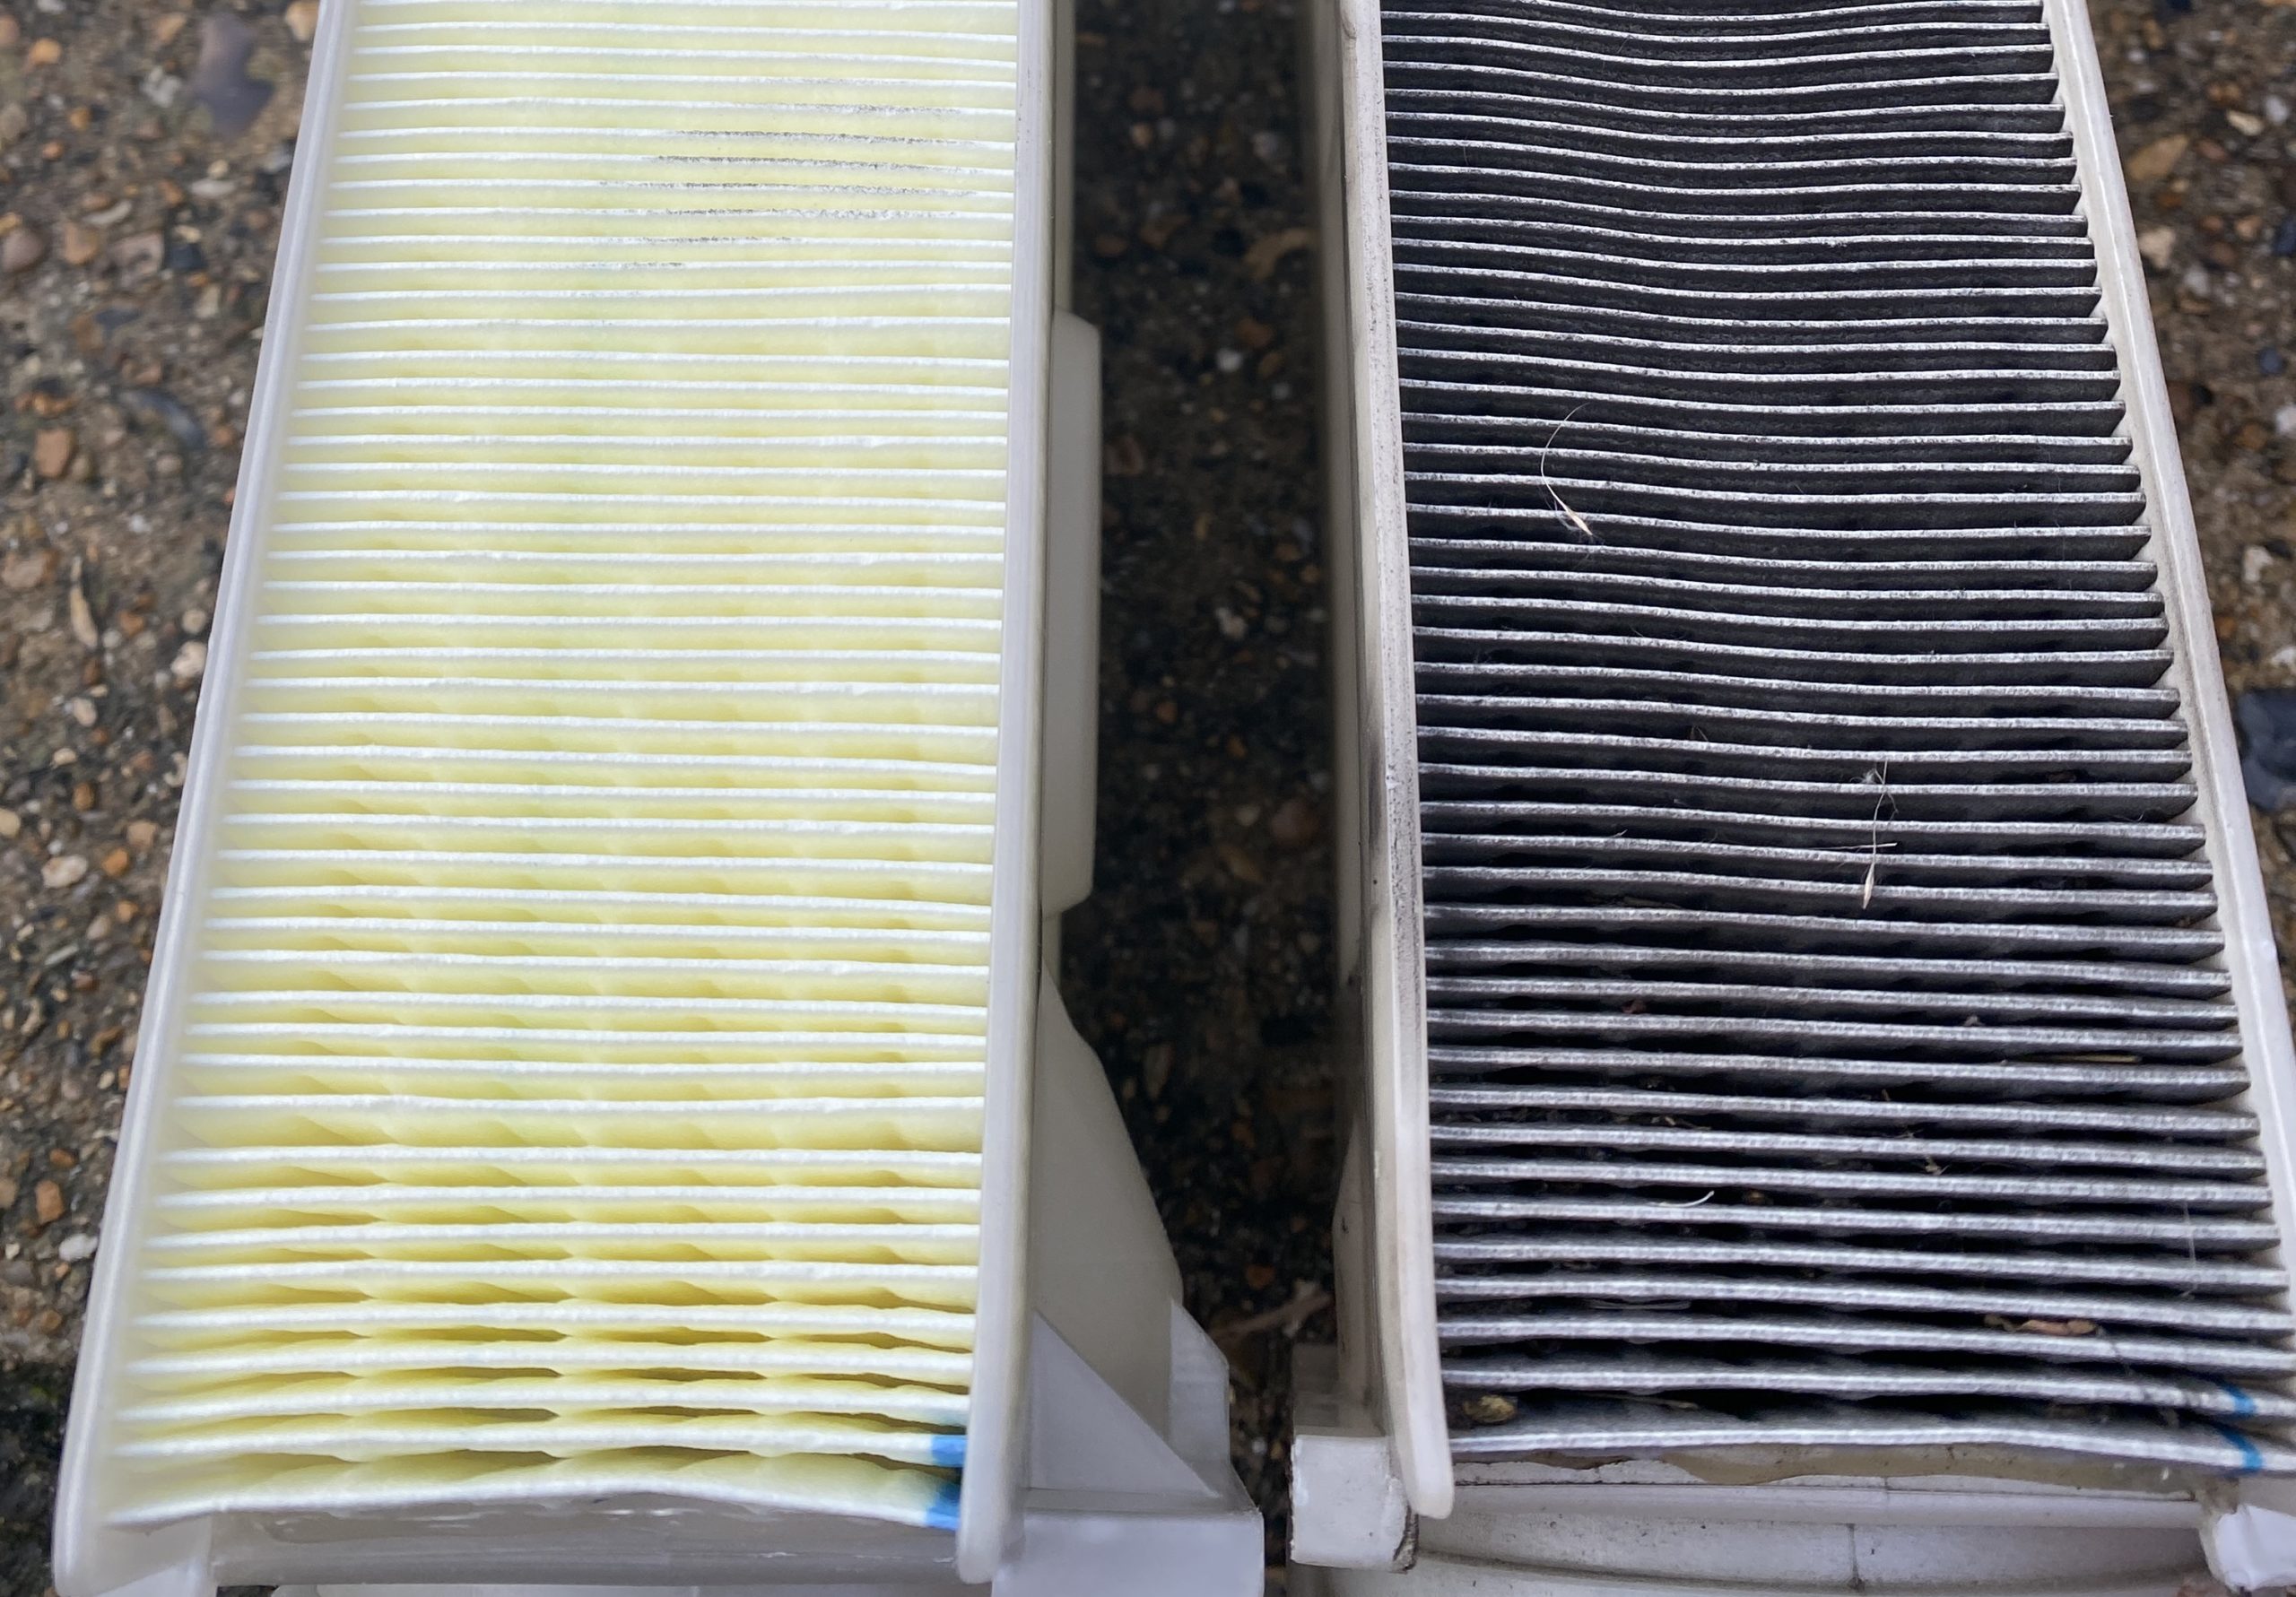
Old Vs New:
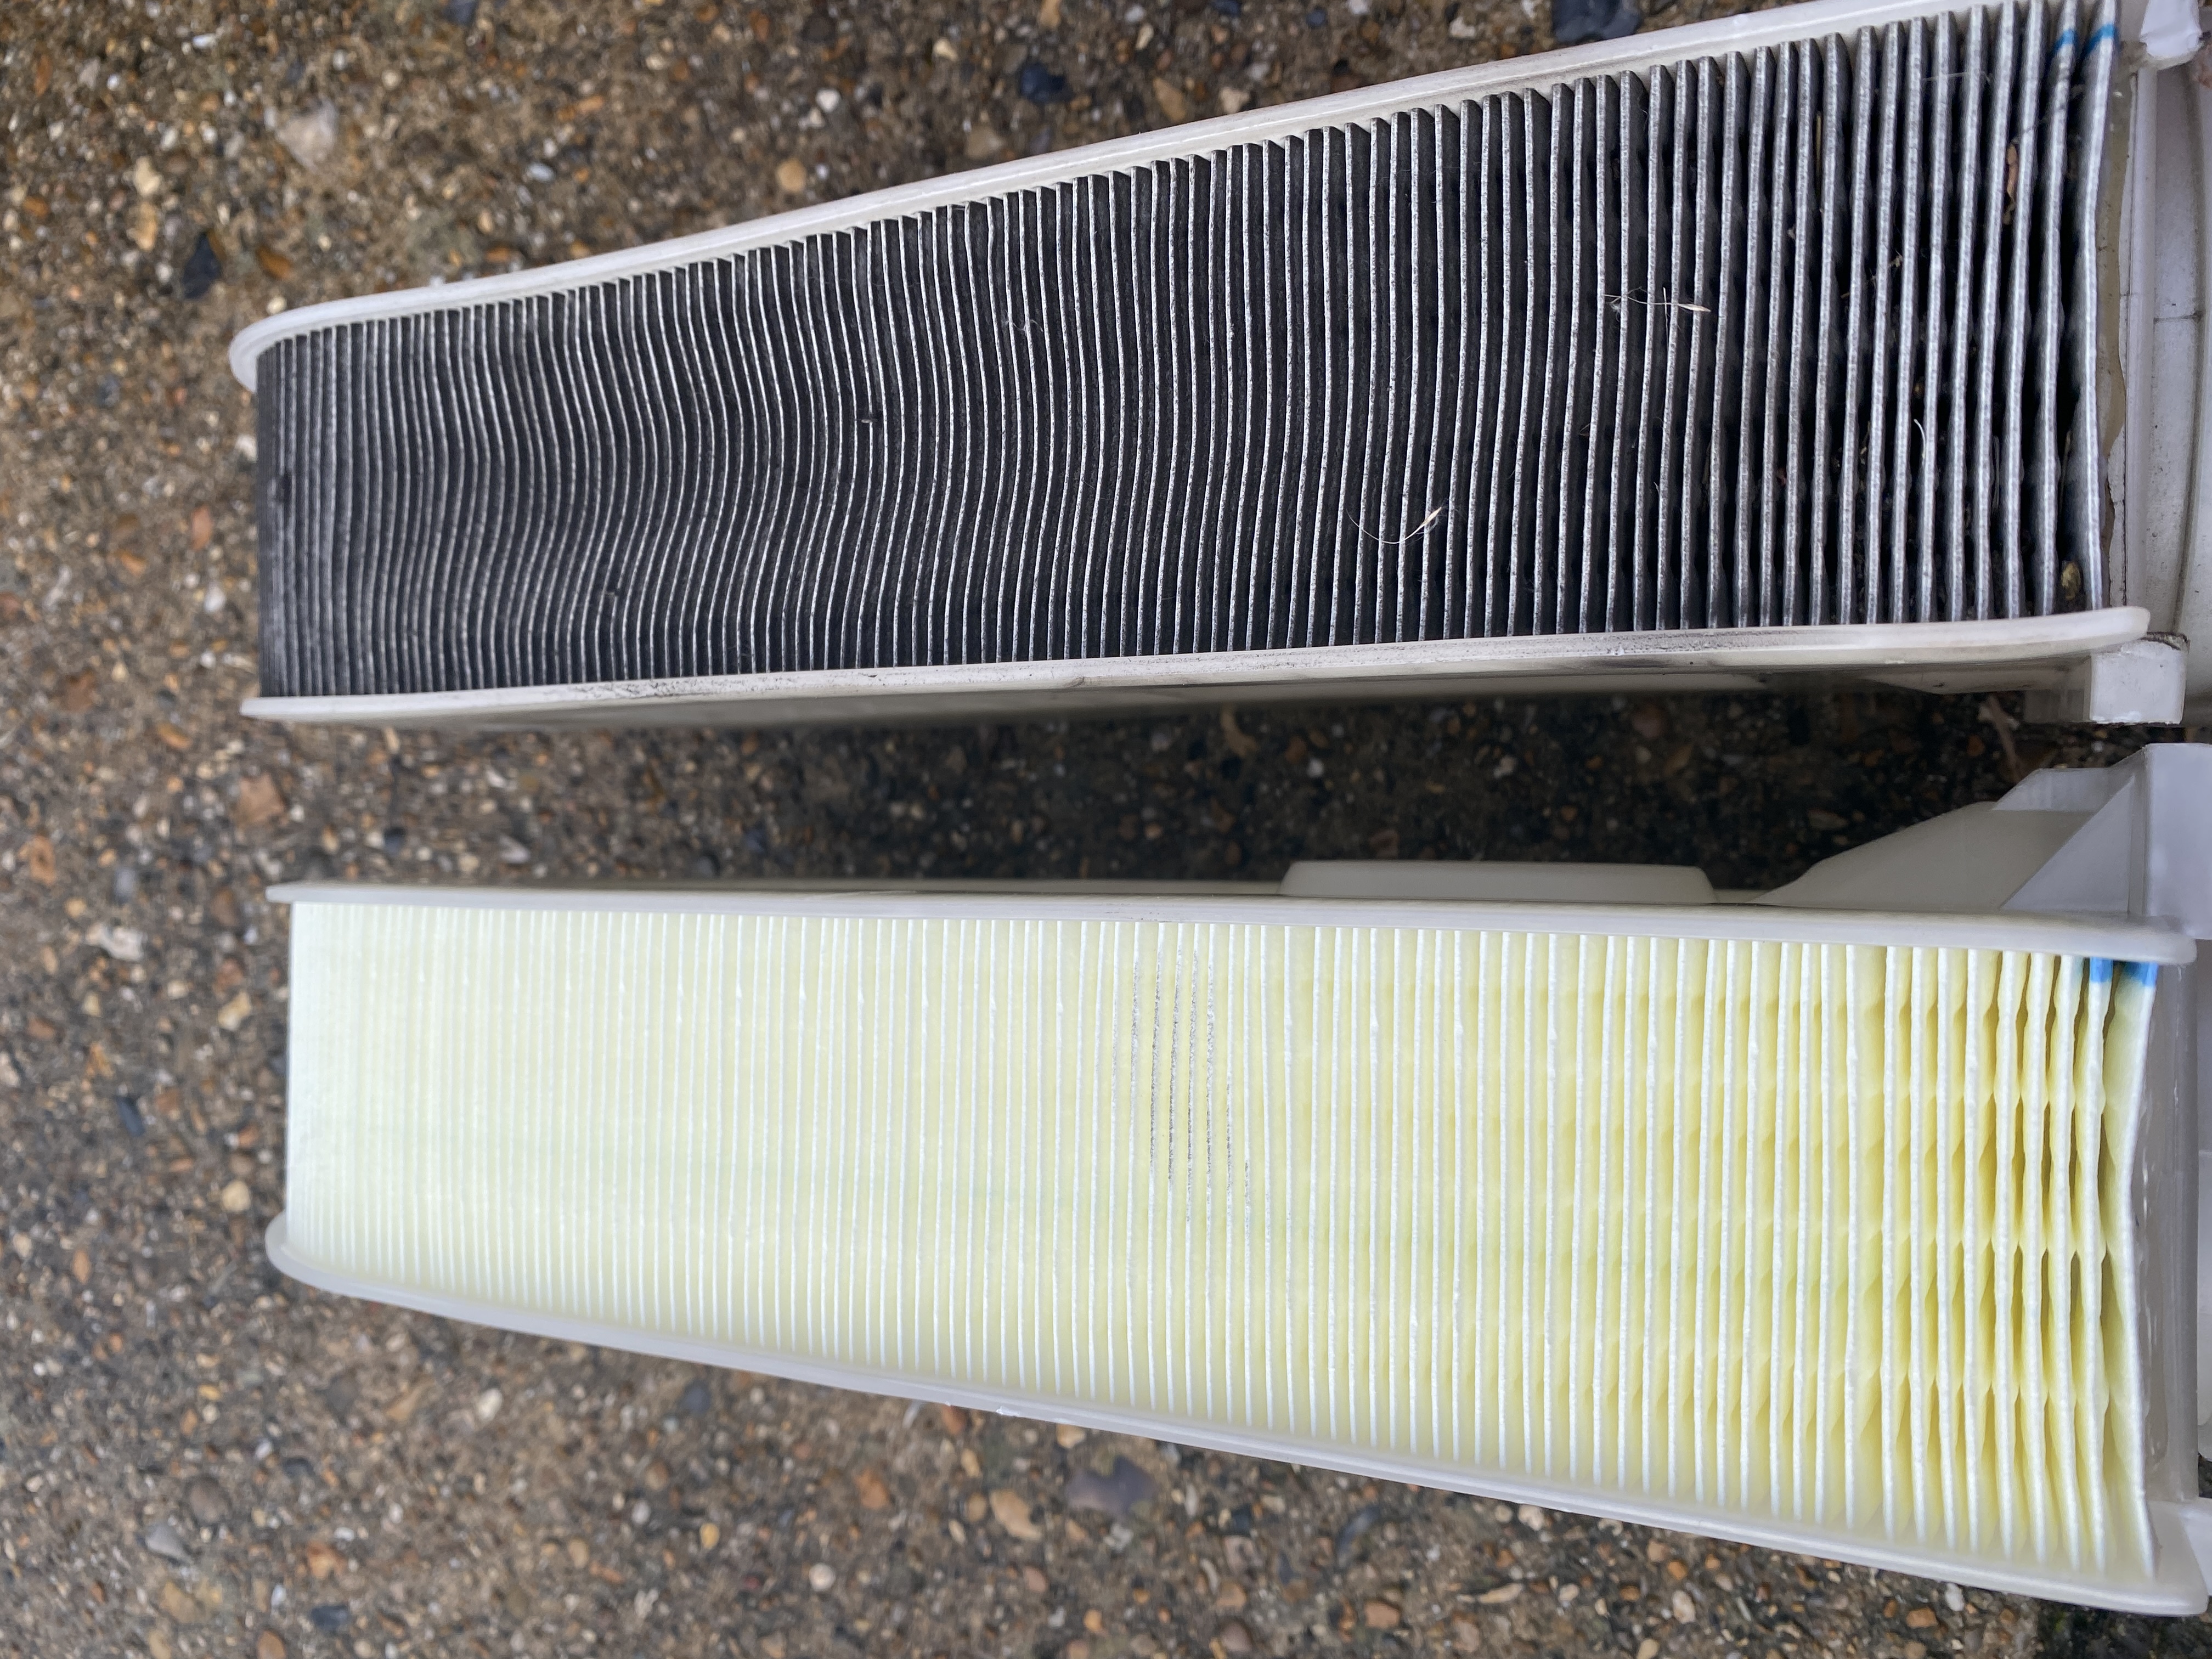
Naturally there is quite a difference from the new to the old. Quite honestly i was expecting it to be much worse, I’ve certainly seen a lot worse! Looking inside the pleats is there was a lot of debris / pollen / seeds / dirt. What ever way i look at it, the flow through it certainly wasn’t great.
New unit in, nice and easy to locate it in position and get the screws back in. Job done… technically, actually there is a next step.
In an ideal world (ideal being having access to Xentry or any mainstream diagnostic machine) you need to reset the adaption data for the air filter. As the air filter becomes more contaminated, (measured by milage since last reset, air mass sensor and pressure sensors in the inlet manifold), the ECU adjusts fuelling to achieve the best between performance and MPG. Most of us aren’t going to have access to do this – and i even know of techs that don’t even bother doing it in a workshop. Whether it makes a difference in a real world scenario i don’t know, i don’t see it making much of a difference personally. (if anyone can correct me please message me!)
End result – I am getting better MPG, back to the 50 mark now which I’m more than pleased with!
Any questions, I am more than happy to try and help. Contact me.
